Digitally signing your Windows application is a crucial step in the software distribution process. It serves as a virtual seal of authenticity, confirming your identity as the publisher and assuring users that the application has not been altered since it was signed. This not only enhances security but also builds trust with your users, helping to prevent security warnings from features like Windows Defender SmartScreen.
This guide will walk you through the process of digitally signing your Windows application using Microsoft's SignTool. Follow these steps to digitally sign your executable or other application files:
Prerequisites for Signing
Before you can sign your application, you will need two key components:
-
A Code Signing Certificate: You must obtain a code signing certificate from a trusted Certificate Authority (CA). This certificate is essential for verifying your identity as a developer.
-
SignTool.exe: This is a command-line tool provided by Microsoft for digitally signing files. It is included in the Windows Software Development Kit (SDK). You can install just the necessary signing tools from the SDK to minimize the installation size.
Step 1: Install SignTool
If you don't already have it, download and install the Windows SDK from the official Microsoft website.
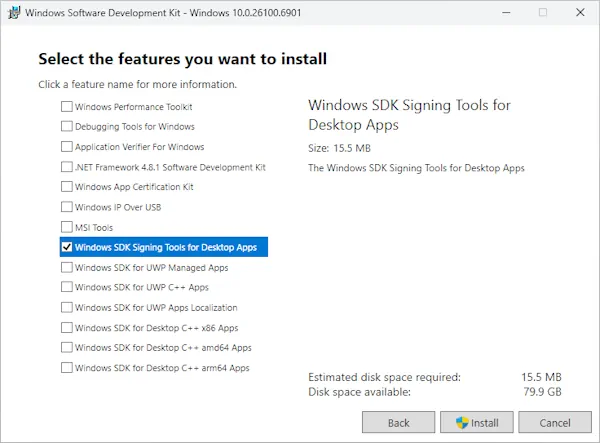
During the installation, you can choose to install only the "Windows SDK Signing Tools for Desktop Apps" to get SignTool. The tool is typically located in a directory similar to:
"C:\Program Files (x86)\Windows Kits\10\bin\<version>\<arch>\signtool.exe"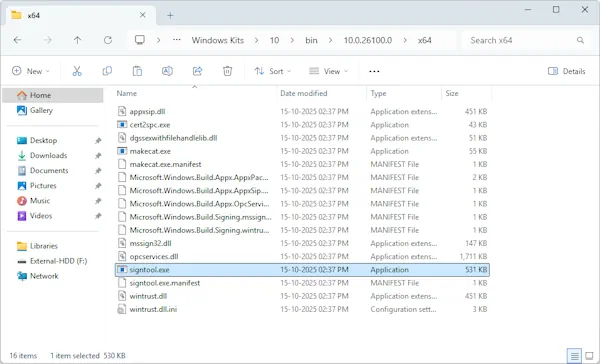
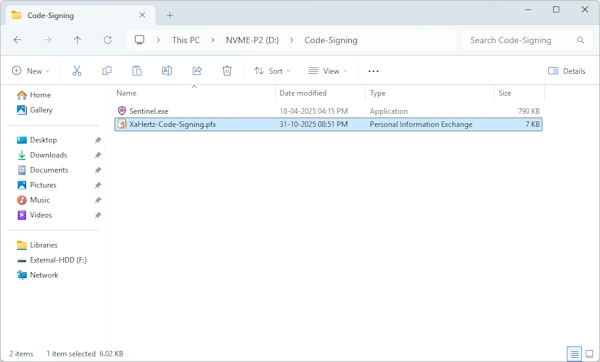
Step 2: Prepare Your Certificate
Your code signing certificate, usually a .pfx file, needs to be accessible on your machine. You will also need the password associated with this certificate.
Step 3: Sign the Application
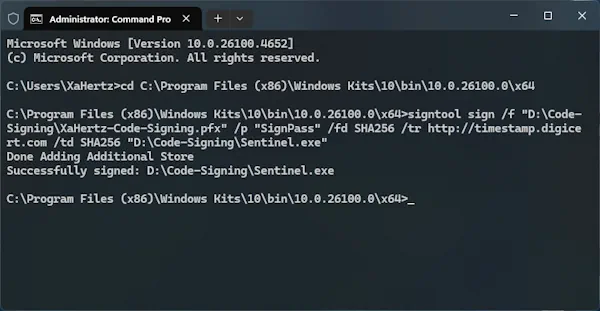
Open a Command Prompt or PowerShell with administrative privileges and navigate to the directory where your application file is located.
Use the following signtool command to sign your application:
signtool sign /f "path\to\your\certificate.pfx" /p "your-password" /fd SHA256 /tr http://timestamp.digicert.com /td SHA256 "path\to\your\application.exe"Here’s a breakdown of the command's options:
- /f "path\to\your\certificate.pfx" — Specifies the path to your code signing certificate file.
- /p "your-password" — Provides the password for your certificate.
- /fd SHA256 — Sets the file digest algorithm. SHA256 is the recommended modern standard.
- /tr http://timestamp.digicert.com — Adds a timestamp from a trusted timestamp server. This is extremely important as it ensures the signature remains valid even after the certificate itself expires.
- /td SHA256 — Sets the digest algorithm for the timestamp signature.
- "path\to\your\application.exe" — The path to the file you want to sign.
Step 4: Verify the Digital Signature
After running the command, you should verify that the signature has been successfully applied. There are two primary ways to do this:
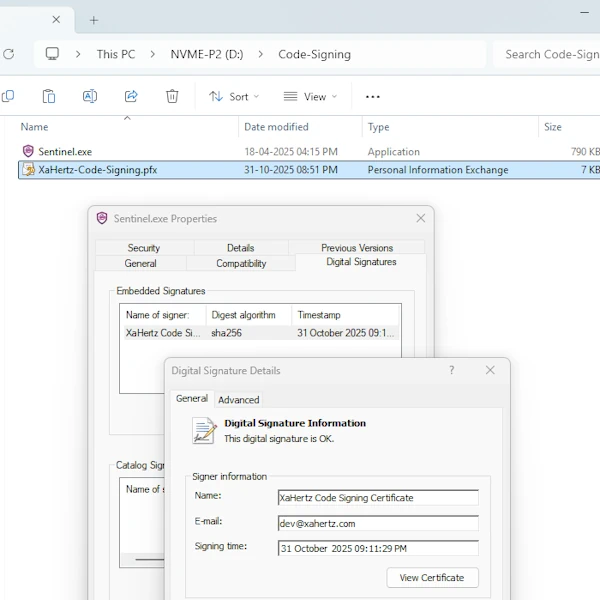
- File Properties: Right-click on your signed application file, select Properties, and go to the Digital Signatures tab. You should see your signature listed, confirming that the file has been signed.
-
Using SignTool: You can also use SignTool to verify the signature with the following command:
signtool verify /pa /v "path\to\your\application.exe"The /pa flag specifies that the default verification policy should be used, and /v provides verbose output.
Final Thoughts
By following the steps outlined in this guide, you can successfully sign your Windows applications using a code signing certificate and Microsoft's SignTool. This process is more than a technical formality; it is a fundamental step in establishing your credibility as a publisher and ensuring your software is trusted by users. Properly signing your application, which includes adding a timestamp to maintain long-term validity, helps prevent security warnings, confirms the integrity of your code, and provides the professional seal of authenticity that users expect.
Last updated on December 8, 2025