Linux are great operating systems, and for beginners, installing Linux in a dual-boot configuration with Windows is the simplest way to get it up and running without sacrificing productivity during the learning phase. Nowadays, you can easily install any beginner-friendly Linux distribution in a matter of minutes, and there are numerous guides available that explain how to do so.
However, there are times when you may want to uninstall it. Maybe you messed something up and can't fix it, or your current distro isn't to your liking, and you want to change it, or something else. There could be several reasons for this, but uninstalling Linux isn't as simple as installing it, especially if it was installed in a dual-boot configuration with Windows, and it's even more difficult if your PC has a UEFI Firmware (which it most likely does if it was manufactured after 2008).
You might wonder if there aren't uninstallation guides available, just like there are installation guides. Well yes, there are guides that explain how to uninstall Linux. Most of them, however, are for PCs with Legacy (BIOS) Firmware and will not work on a PC with UEFI Firmware. Now, I'm not saying those guides are completely incorrect; they just don't work in our situation.
That is why I have created this guide, which is aimed specifically at PCs with UEFI Firmware, to assist you in uninstalling your Linux distro.
Things to Consider
Before we get stared, here's a little heads-up for you:
- As I have stated earlier this guide is aimed at PCs with UEFI Firmware. Therefore, it will not work on a PC with Legacy Firmware. If you don't know your PC's Firmware type, you can check that in System Information, under System Summary > BIOS Mode.

- We'll be deleting some partitions from your Disk. So, be careful while doing this, otherwise you may end up deleting a partition you care about.
- Please do not delete Linux partitions before removing the GRUB2 Boot-Loader from your PC's EFI System Partition. As it will make your PC unable to boot.

Part 1: Removing the Boot-Loader
We'll begin by removing the GRUB2 Boot-Loader from your PC's EFI System Partition. Since removing Linux partitions isn't enough to completely uninstall a Linux distro because the GRUB2 Boot-Loader will prevent your PC from booting if it isn't removed first.
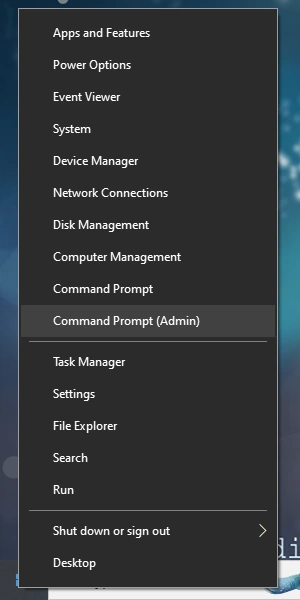
So, to start we'll remove the GRUB2 Boot-Loader. First, launch Command Prompt or PowerShell,
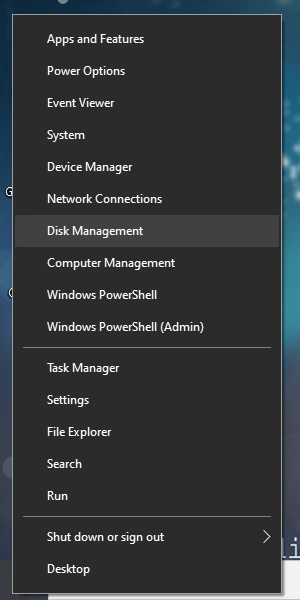
whichever you prefer, as administrator by performing a right-click on the Start Menu and choosing
Command Prompt (Admin)
or Windows PowerShell (Admin)
, whichever is present on that menu.
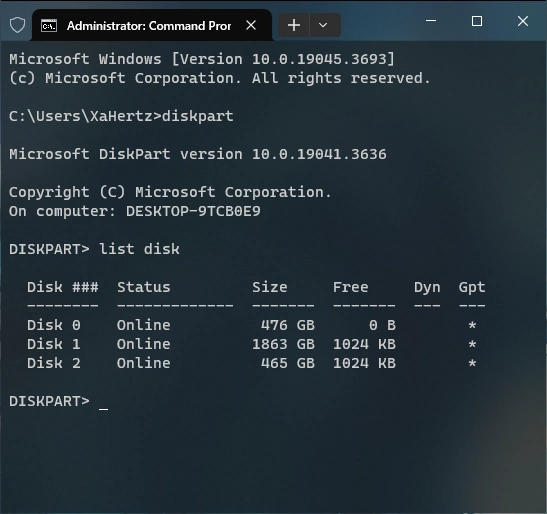
Now, run the following command to start DiskPart utility:
diskpartThen, this one to show a list of all Disks connected to your PC:
list diskIf you have multiple Disks, then you'll need to identify your System Disk (Disk on which Windows and Linux are installed). If you don't know which one is your System Disk, you can check that by going to Disk Management.
Now, run this command to select your System Disk (replace 0 with your Disk number):
select disk 0After that, run this command to list all partitions on your Disk:
list partition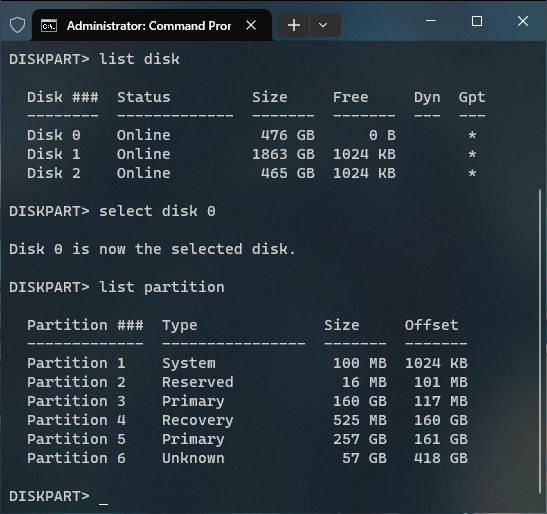
From this list, you'll need to identify your EFI System Partition (It's Type will be mentioned as
System
, and it will be around 100 MB in size). Now, run this command to select your EFI
System Partition (replace 1 with your Partition's number):
select partition 1Then, run the following command to give a Drive Letter to your EFI System Partition. By doing this we'll be able to modify files inside it. You can use any letter you want as long as it's not already in use.
assign letter=xAfter that, run this command to leave DiskPart:
exit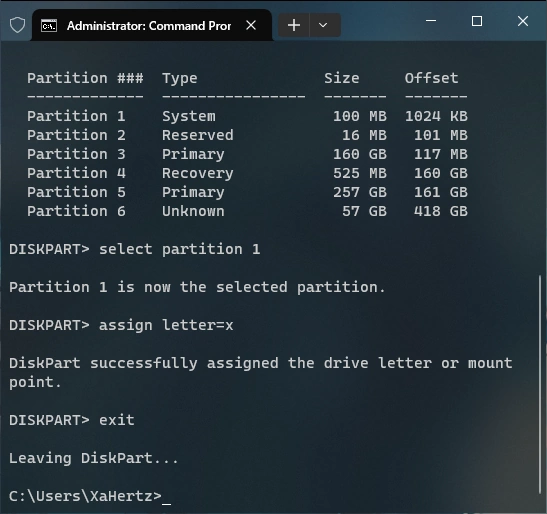
Now, we need to enter the Partition we just mounted. To do that just type the Drive Letter you chose while mounting it along with a colon(:) sign.
x:Now to see the contents of this Partition type:
dir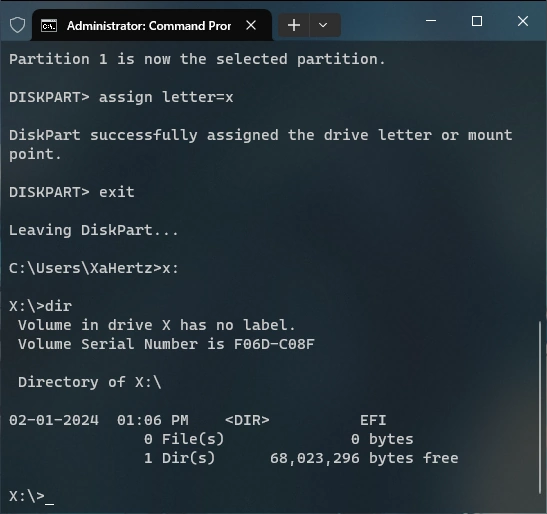
Here you will see a folder named EFI, we need to enter it. To do that just type:
cd efiNow to see the contents of this folder, again type:
dir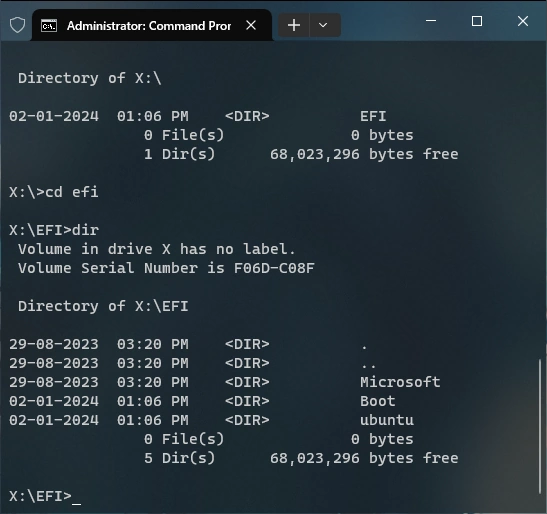
Here you will see a folder with the name of your Linux distro (Ubuntu, Debian, Fedora, etc.). We need to delete this folder. To do that run the following command replacing the folder-name with your distro, exactly the way it is shown in the list. This command is a little different on Command Prompt and PowerShell, so use the one according to the shell you are using.
Command Prompt :
rd folder-name /sPowerShell :
rd folder-name -r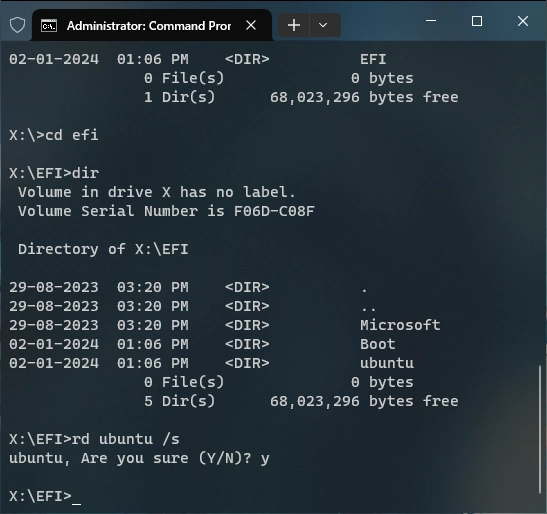
Now type DIR again to make sure its deleted and then close the Command Prompt:
dir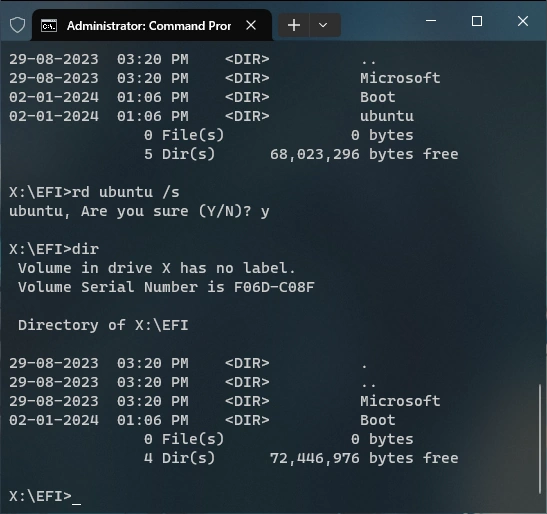
Part 2: Deleting the Partitions
The GRUB2 Boot-Loader is now gone. Deleting all Linux partitions is what we will do next. First,
launch Disk Management by performing a right-click on the Start Menu and choosing Disk Management.
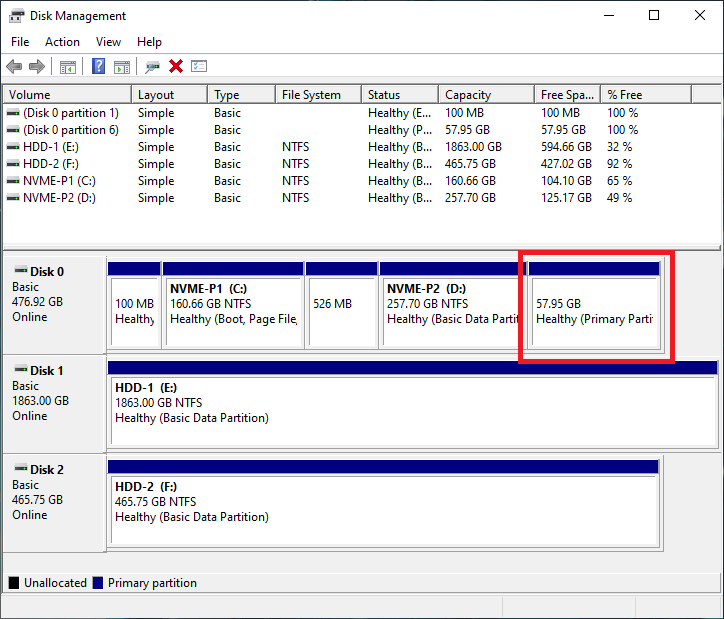
Then, identify your Linux partitions, depending on your configuration you may have a single Linux partition or may have multiples of them. Look for partitions that don't have a Drive Letter, like (C:), (D:), etc. and don't have a File System mentioned, like NTFS or FAT32. But, do not delete any partitions with labels like EFI, System, OEM, Boot, Recovery or something similar.
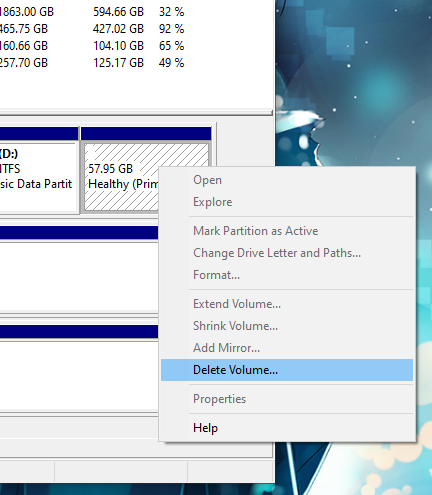
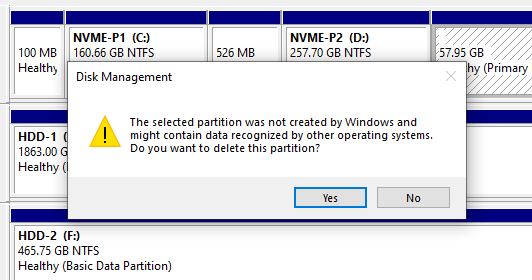
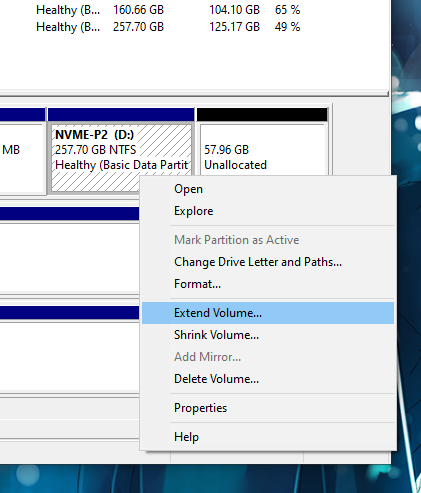
Now to Delete them, Right-click on them one-by-one and select Delete Volume
. Select Yes when prompted.
After that, Right-click on the partition very next (on left-hand side) to the deleted partitions
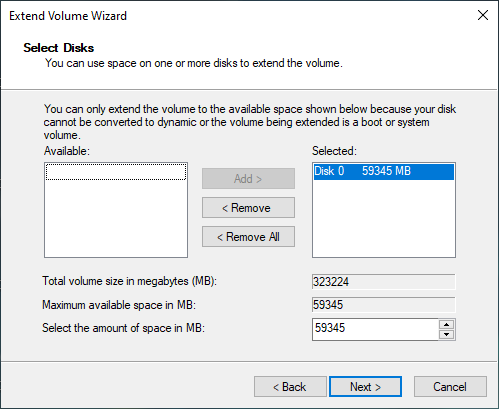
and click Extend Volume
. Doing this will open a wizard that will help you in merging the
free space obtained from the deleted partitions to the adjacent partition.
And Done! You have successfully uninstalled your Linux distro from your PC. I hope this article was helpful and saved you some hassle. Thanks For Reading!
Last updated on October 25, 2025