Are you constantly battling time discrepancies when switching between Windows and Linux? Do your scheduled tasks seem off after booting into a different operating system? You're not alone! This is a common frustration for dual-boot users, and it often stems from how each OS handles the hardware clock – that internal clock inside your computer that is used by both to keep track of time.
The Problem: Local Time vs. UTC
Windows typically uses local time for its system clock, meaning it adjusts the hardware clock based on your current time zone. Linux, however, frequently defaults to Coordinated Universal Time (UTC). This difference can lead to a cascade of problems:
- Incorrect Times: You might see jumps in time when switching between operating systems.
- Logging Inconsistencies: Log files across both Operating Systems could show different timestamps, making troubleshooting difficult.
- Scheduling Errors: Scheduled tasks and cron jobs may not run as expected.
The Solution: Embrace UTC!
Fortunately, there's a straightforward solution that can bring harmony to your dual-boot setup: setting Windows to use UTC for its hardware clock. This aligns Windows with Linux’s approach and eliminates most of those annoying time-related headaches.
How To Do It?
Enabling UTC in Windows is straightforward — just follow these steps:
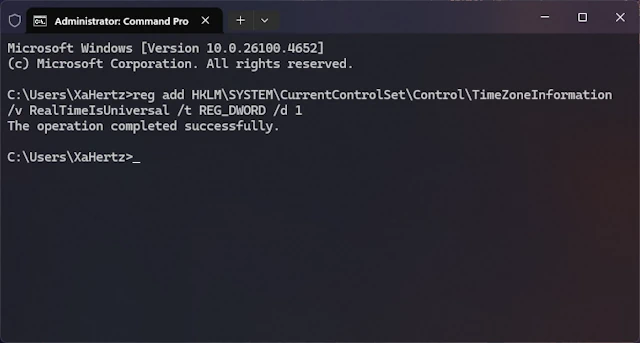
- Open Command Prompt as Administrator
Press the Windows key, type "cmd", right-click on Command Prompt and select Run as administrator. — This is essential!
-
Paste & Run the Command
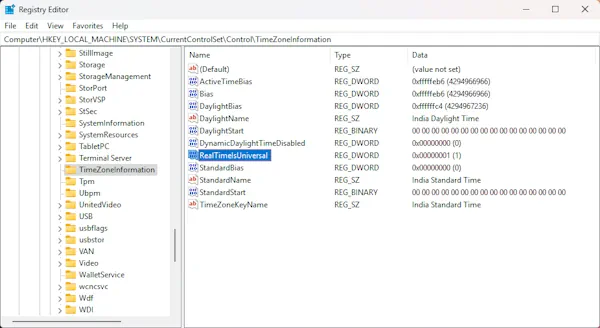
Copy and paste this command into the Command Prompt window and press Enter:reg add HKLM\SYSTEM\CurrentControlSet\Control\TimeZoneInformation /v RealTimeIsUniversal /t REG_DWORD /d 1This command adds a setting (key) to your Windows registry, telling it to treat the hardware clock as UTC.
- Restart Your Computer
Don't skip this! The changes won’t take effect until you restart your computer.
Reverting to Local Time
If you decide UTC isn't for you (though we think it is!), you can easily revert back to Windows' default behavior — just follow these steps:
- Open Command Prompt as Administrator
Again, Press the Windows key, type "cmd", right-click on Command Prompt and select Run as administrator.
-
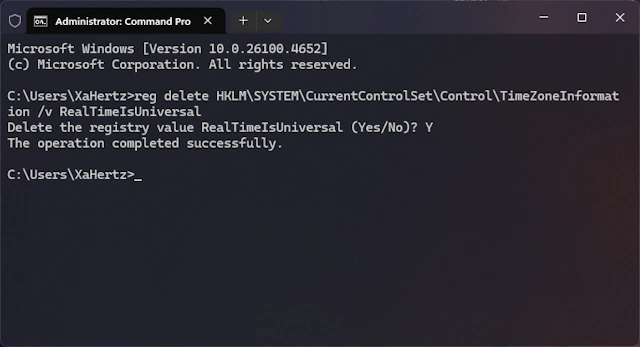
Paste & Run the Command
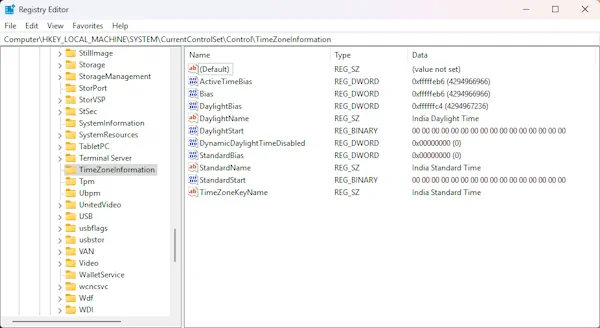
Copy and paste this command into the Command Prompt window and press Enter:reg delete HKLM\SYSTEM\CurrentControlSet\Control\TimeZoneInformation /v RealTimeIsUniversalThis command deletes the key from your Windows registry, reveting it back to the default behavior of treating the hardware clock as local time.
- Restart Your Computer
Then, restart your computer again. The changes won’t take effect until you restart your computer.
Important Notes & Potential Issues:
-
Time Zone Changes
Changing your time zone in Windows after enabling UTC might require a little manual tweaking to ensure accurate local time display within applications. -
Network Time Protocol
Make sure your computer is properly synchronized with an NTP server. This ensures the accuracy of your UTC hardware clock. Windows usually handles this automatically, but it's good to double-check. -
Rare Compatibility Issues
While generally a win-win, there’s a small chance that forcing UTC could cause unexpected behavior with specific applications heavily reliant on local time calculations. If you encounter problems, revert back to the default setting.
Final Thoughts: A Smoother Dual-Boot Experience
Switching your Windows hardware clock to UTC is a simple yet powerful way to improve compatibility and eliminate frustrating time discrepancies when dual-booting between Windows and Linux. Give it a try, and you might get surprised at how much smoother your experience becomes!
Last updated on October 25, 2025